Last Thursday - March 19th, 2020 - we here at //SEIBERT/MEDIA were planning on holding our Atlassian Enterprise Club Day (AEC) with Linchpin as a traditional in-person event at our premises in Wiesbaden. But the unexpected coronavirus pandemic has thrown us - as with many other businesses - a curveball that we needed to adjust to. We ultimately decided that, rather than canceling the event outright, that we would convert it from an in-person event to a remote event.
We live-streamed the event via our YouTube channel. Our two presenters, Adil and Martin, guided our remote audience through the event. After - and even during - our live AEC show, several participants asked us about the technology that we used. We wanted to give everyone a more detailed look behind the scenes here in this article.
The truth is, we put something together in a very short timeframe using the gear and strategies that we already use for our regular TechTalks and Google Meetups. Keeping this in mind, our setup that we'll describe here might not be ideal for everyone, but nevertheless, we hope that our how-to story is still inspiring and useful to you.
Video mixer
The central unit that drives our live studio production is the ATEM Mini video mixer from the Australian company Black Magic Design. The compact piece of gear is designed specifically for YouTubers and other smaller video productions: which is why it's perfect for our needs.
The video mixer allows us to seamlessly switch between up to four HDMI sources - whereas when we use basic HDMI switches, the signal is momentarily lost on the output side. These video sources can also have different screen resolutions. In essence, the ATEM Mini converts everything into a uniform production resolution (in our case, 1080p60), ensuring that the stream works equally well with all notebooks, PCs, and cameras.
The video mixer can also mix the audio signals that come from each of the HDMI sources individually, which we found to be particularly useful for our productions.
In our live studio, we have a notebook that we used for playing back previously recorded lectures during the stream. This allowed us to prepare the next clip on a second notebook while the first was still playing. We also used laptops for switching to the live hangout.
We set these two computers up next to the video mixer in our improvised control room. This way, we could operate the whole set up from offstage so that the moderators could concentrate on speaking and creating useful content. It's essential to have different people in producer and host roles. Otherwise, it's too much for just one person to do!
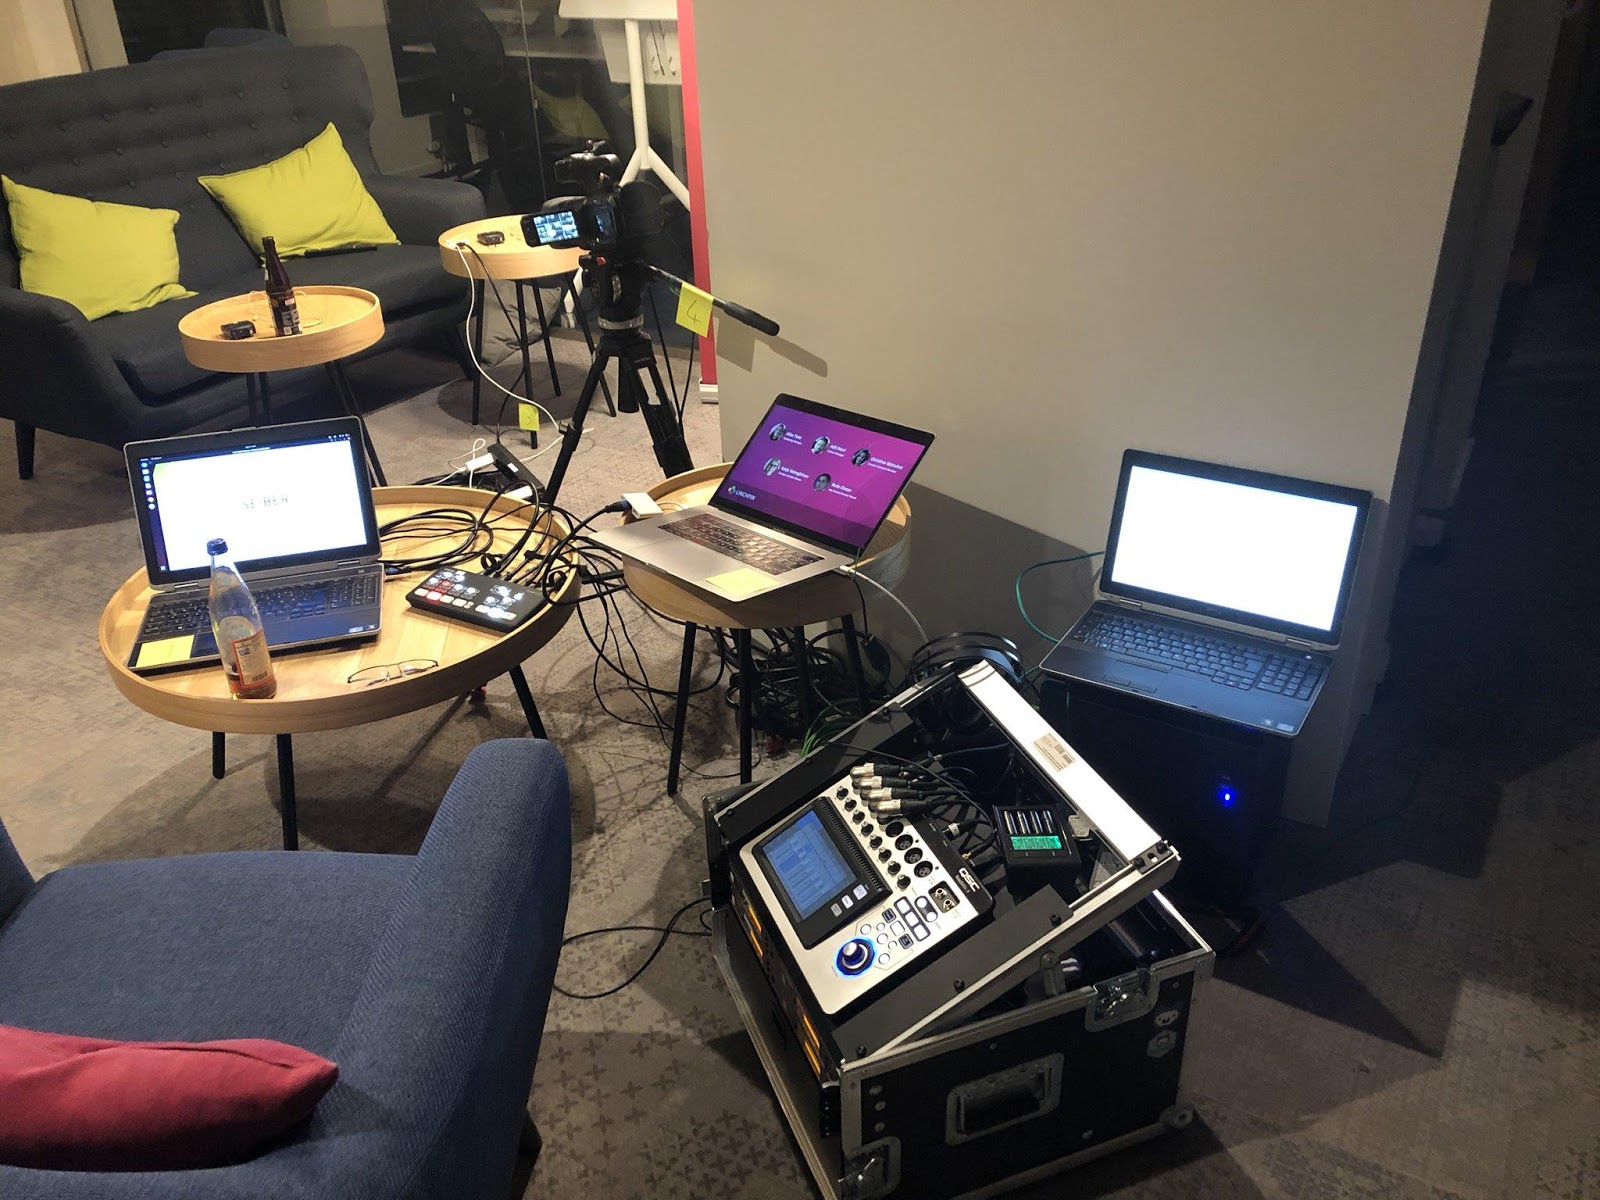
Having said that, one of the four inputs was connected to Adil's notebook so that, as a presenter, he could show things directly to the audience. This set up was especially useful at the beginning of the stream when we were looking at the agenda together.
Camera
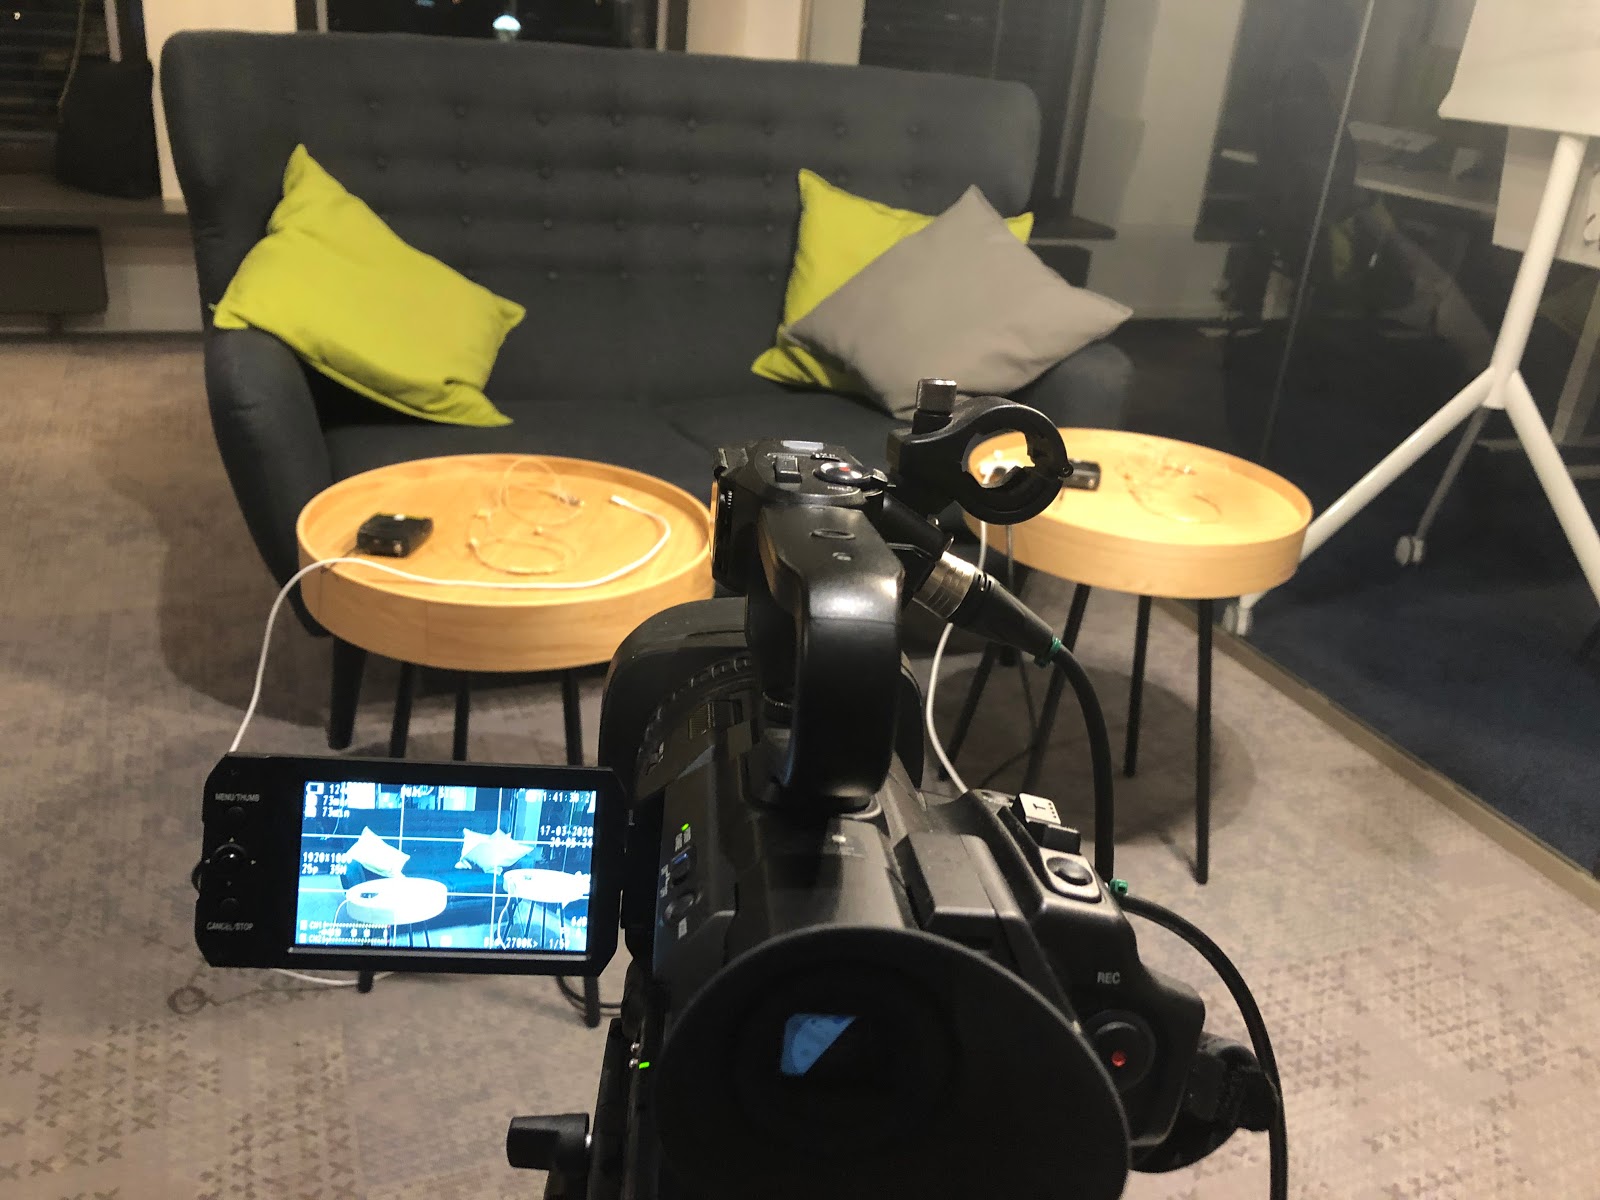
Our fourth input was a camera. We've used two JVC GY-HM200E cameras at //SEIBERT/MEDIA for the past several years. These entry-level broadcast cameras are ideal for smaller productions of this kind.
Many companies already have digital SLR (DSLR) cameras on hand, and in the case of an emergency, you can use these for video creation tasks, but cheaper models just don't work well for broadcasting. Before you choose your camera, first check and make sure that it works when it's connected to a power supply, how much offset the output video image on the HDMI connector has compared to the direct signal, and how you want to connect your microphones.
Microphones
We recommend using lavalier (clip-on) and headset microphones for live streaming as they're the best for stage and studio applications. Lavalier mics are perfect for attaching to shirts and ties, but we've found that they don't work as well on T-shirts or sweaters because they often move around too much you get a lot of rustling and other undesirable noises. Headset microphones are one-size-fits-all: they can work with any head shape, they adapt to your face, and they also work well with any clothing. While they are generally adaptable, we've found that people with long beards or who wear dangly earrings can give headset microphones some problems.
Lavalier and headset microphones are particularly suitable for a stage or studio situation. Lavalier microphones are ideal for attaching to shirts and suits. (On T-shirts or sweaters they often move too much and produce rustling and other noise). Headsets are suitable for almost all head shapes and can be adapted to any face. They also work with any type of clothing. The only problems can be very long beards and heavy or long earrings.
It's worth mentioning that we've had our fair share of problems with unilateral (one-sided) headset microphones because we've found that it's not so easy to put them on correctly. We've also noticed that handheld microphones have given us problems because unless they've had prior training and experience, presenters don't naturally hold the microphone in precisely the same way for an extended timeframe. Handheld mics also inhibit presenters from using both hands to illustrate a point, or to use digital presentation aides such as a notebook, and using mic stands tends to be awkward in many situations.
Headset microphones are what we use for more conventional lectures. We use wireless microphones so that our speakers can move freely "on stage." When recording or streaming in a purely studio situation, though, wired microphones work perfectly fine: you can use power adapters for lavalier or headset microphones, or you can even use table microphones. You have hundreds of different solutions to choose from. The microphone solution you settle on often comes down to your own personal taste when selecting between multiple viable options.
Mixing console
If you have more than one speaker, we recommend that you use a separate mixing console. We use a QSC TouchMix 8 for our regular events. It's a quality mixer, and we're happy with the sound. If you're streaming in a purely studio situation, the ATEM Mini has a built-in audio mixer that should do the trick, but we haven't used it very much so far.
For our Remote AEC set up, we ran the wireless microphones into their respective receivers. We then ran those through the mixing console, and we fed one of the auxiliary (AUX) outputs directly into the camera. This way, the audio signal remained automatically and continuously synced with the camera for both the stream and the recording.
Streaming and Recording
Now that we made sure that all of our video and audio sources were set up correctly and sent to the video mixer, the only thing left to do was record and stream the output. The ATEM Mini has a USB-C connector for precisely this purpose, so it connects like a webcam on a PC or a Mac. We streamed to YouTube and simultaneously recorded the feed using Open Broadcaster Software (OBS) Studio.
Summary
A/V (audiovisual) technology is a complex subject that many companies tend to shy away from. One of the biggest deterrents is the initial costs: you can quickly spend several thousands of euros on equipment that might end up gathering dust in a cupboard!
Having said that, if you want to take the next step beyond the quality that your notebook or phone's internal camera and microphone have to offer, or if you want to work with several people on a stage, you'll eventually need to enter into the field of A/V technology.
We're happy to support you with all of your questions regarding distributed working and transitioning to a remote company. Just get in touch with us today! We couldn't have organized our AEC event without tools such as G Suite with Hangouts Chat and Hangouts Meet as well as our go-to intranet and extranet Confluence - especially in such a short time frame.
Lesen Sie diese Seite auf Deutsch
Further Information
Our journey to working remotely at //Seibert/Media
Shared software: How to make remote workers into a team
Distributed Collaboration: Big Meetings, Big Problems?
Agile Hive: PI Planning in the time of Covid-19


