Jira and Confluence Best Practices
Jira helps in team planning and project work by offering scalable development for Agile teams. On the other hand, Confluence is a powerful collaboration solution that transforms project management, team decision-making, and content management by offering a simple, effective, and single-space interface.
While they are both great solutions, together, they synergize into a powerful organizational platform that lets you structure your content, files, and stories for a successful project plan. By integrating your Jira applications into Confluence, your team members access all the information they require from a single dashboard while staying on track with the project calendar.
Atlassian built Confluence and Jira to complement each other to achieve efficient team collaboration. With integration in place, team members can easily reference and view Jira issues directly on Confluence. Besides, project staff can gather requirements, take notes, create and update Jira issues without leaving Confluence. Integrating Confluence with JIRA also reduces time wastage through context switching while improving the visibility of all projects from a single pane of glass.
Jira-Confluence Integration
Be sure to click on the images that follow to enlarge them!
1. Prepare Team Reports and Charts Using Jira Chart Macro or Gadgets
It is vital to have a project’s reporting information in a single centralized and accessible repository. Since a project usually involves extensive documentation, an organization needs the right approach to organize information and leave room to consistently include additional content. With Jira-Confluence integration, an organization can store all reports and project content in a single place, eliminating the need for multiple storage locations.
Steps to create Jira reports in Confluence
- First, use application links to connect your Jira Instance with Confluence.
- Find the link to the JIRA Report you intend to view in Confluence.
- To achieve this, in the JIRA instance, click the Dashboards link towards the top left of the page.
- Click Create Dashboard, and on the next page, specify the name and description.

- Click on Add a New Gadget to create a Gadget for Your Report.

Highlight this gadget’s URL and save it for later use.
3. Now, it’s time to connect this Report with Confluence.
- Navigate to the Confluence Page on which you want to view your report.
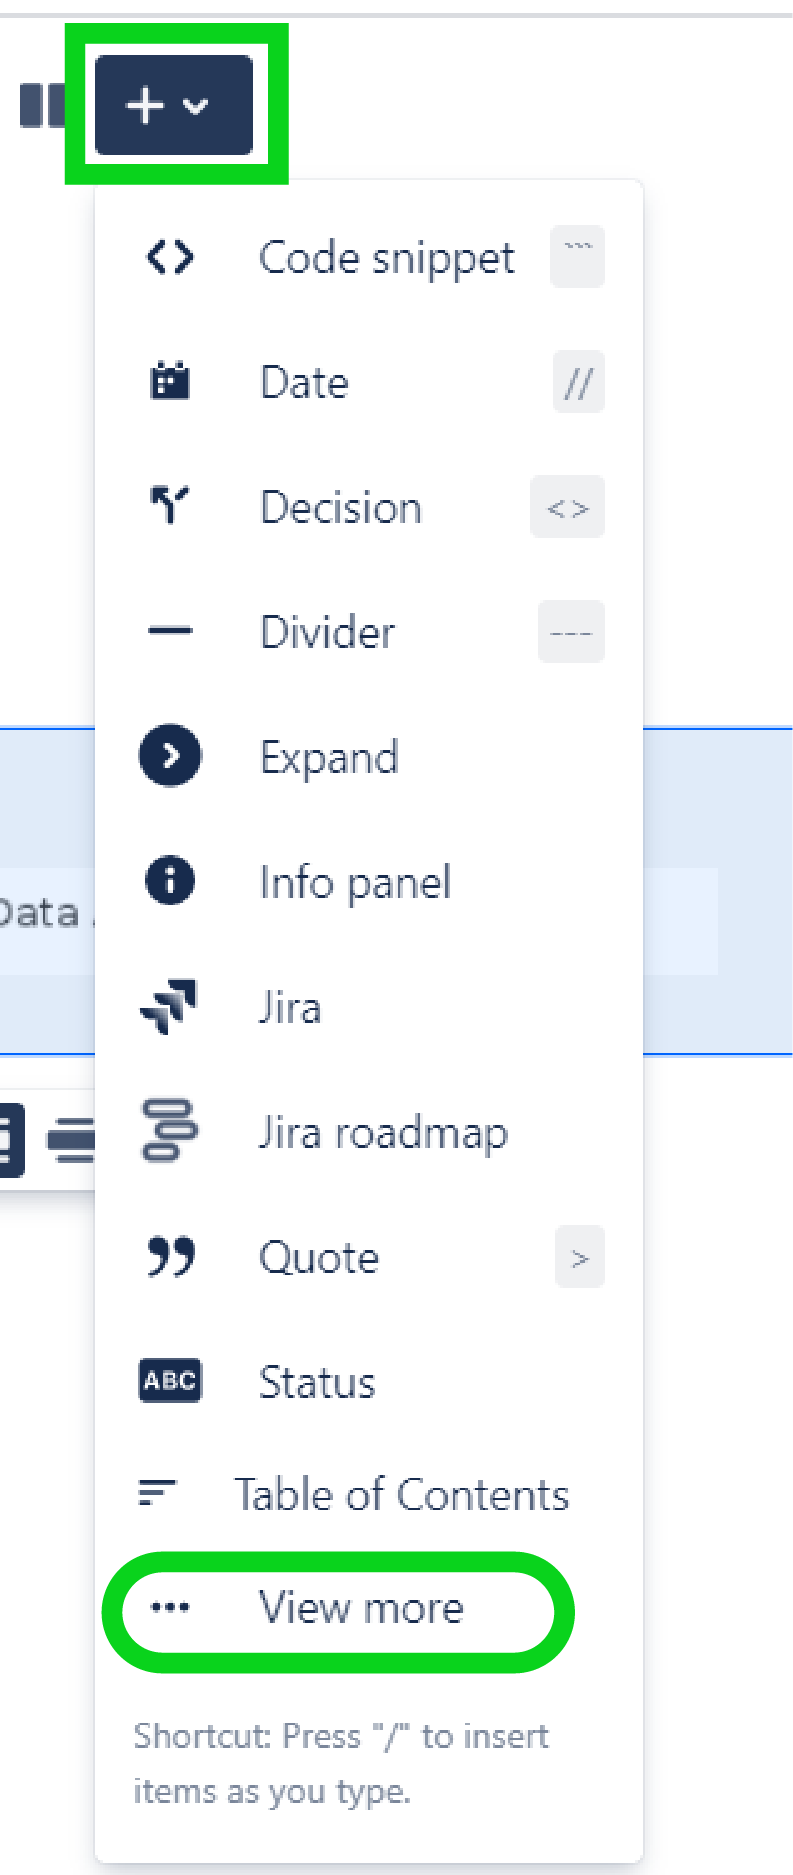
- Click on the Insert icon, then View More from the pop-up menu shown in the screenshots below.
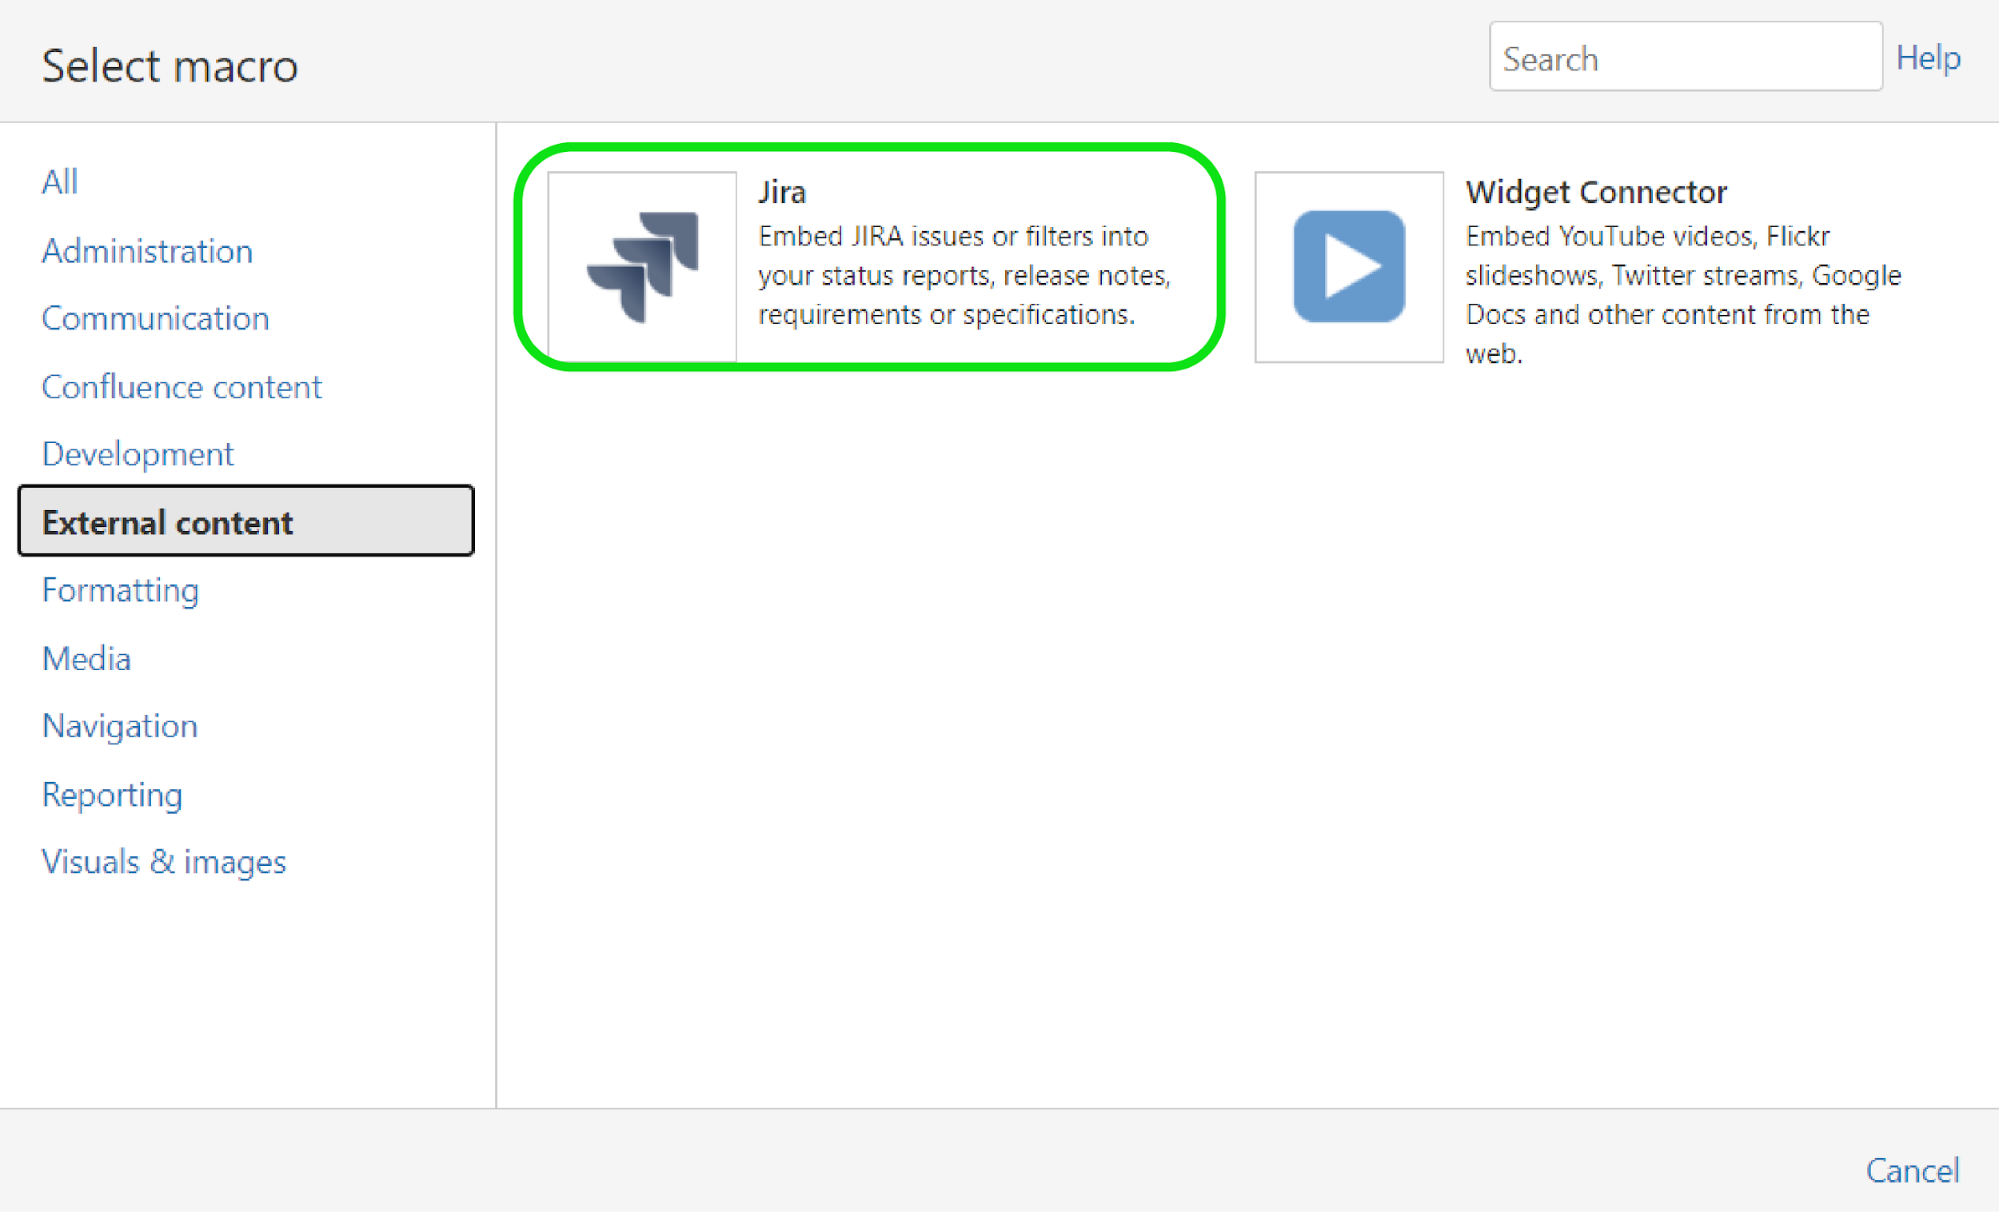
- Click External Content from the left panel, then select Jira.
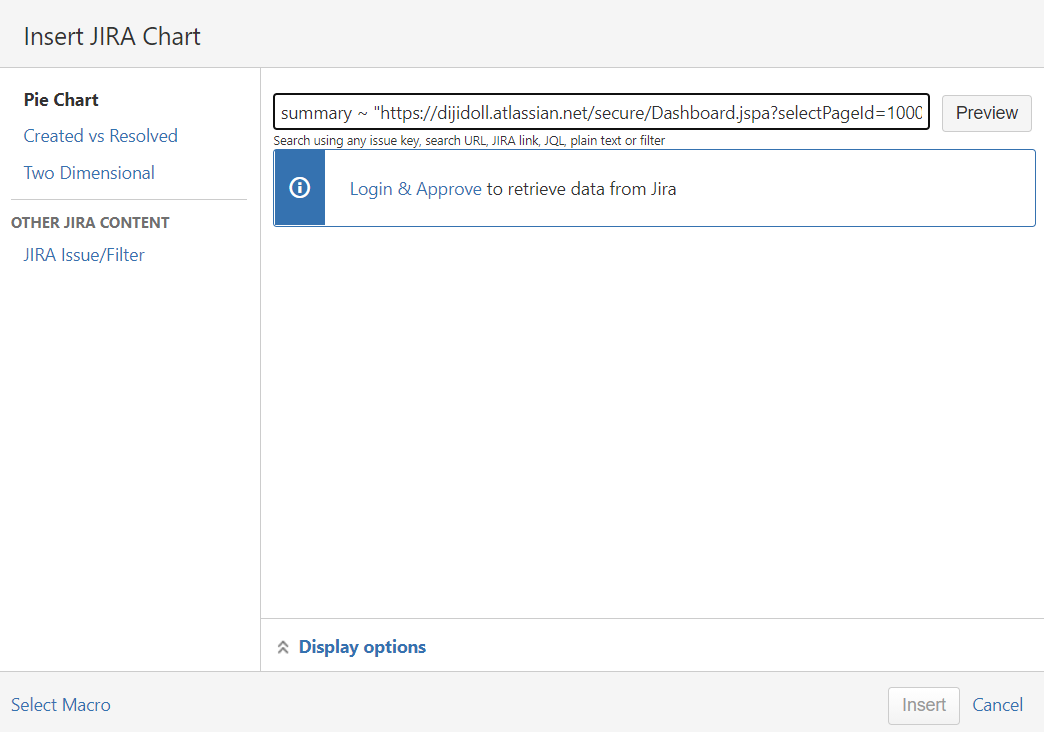
- Type your Filter’s name or URL into the search box to display it on your Confluence page.
2. Use the Jira Macro to Display Application Issues Directly in Confluence
To display application information directly on a confluence page, you will need to add Jira Issues Macro with Confluence. With this Macro, you can easily observe issues using a Filter, URL, or Jira Query Language search.
The procedure for adding the Jira Issues Macro to your Confluence page is as follows:
- Use application links to connect Confluence with your Jira Application.
- In the Confluence editor, select Insert, then pick Jira from the drop-down menu.
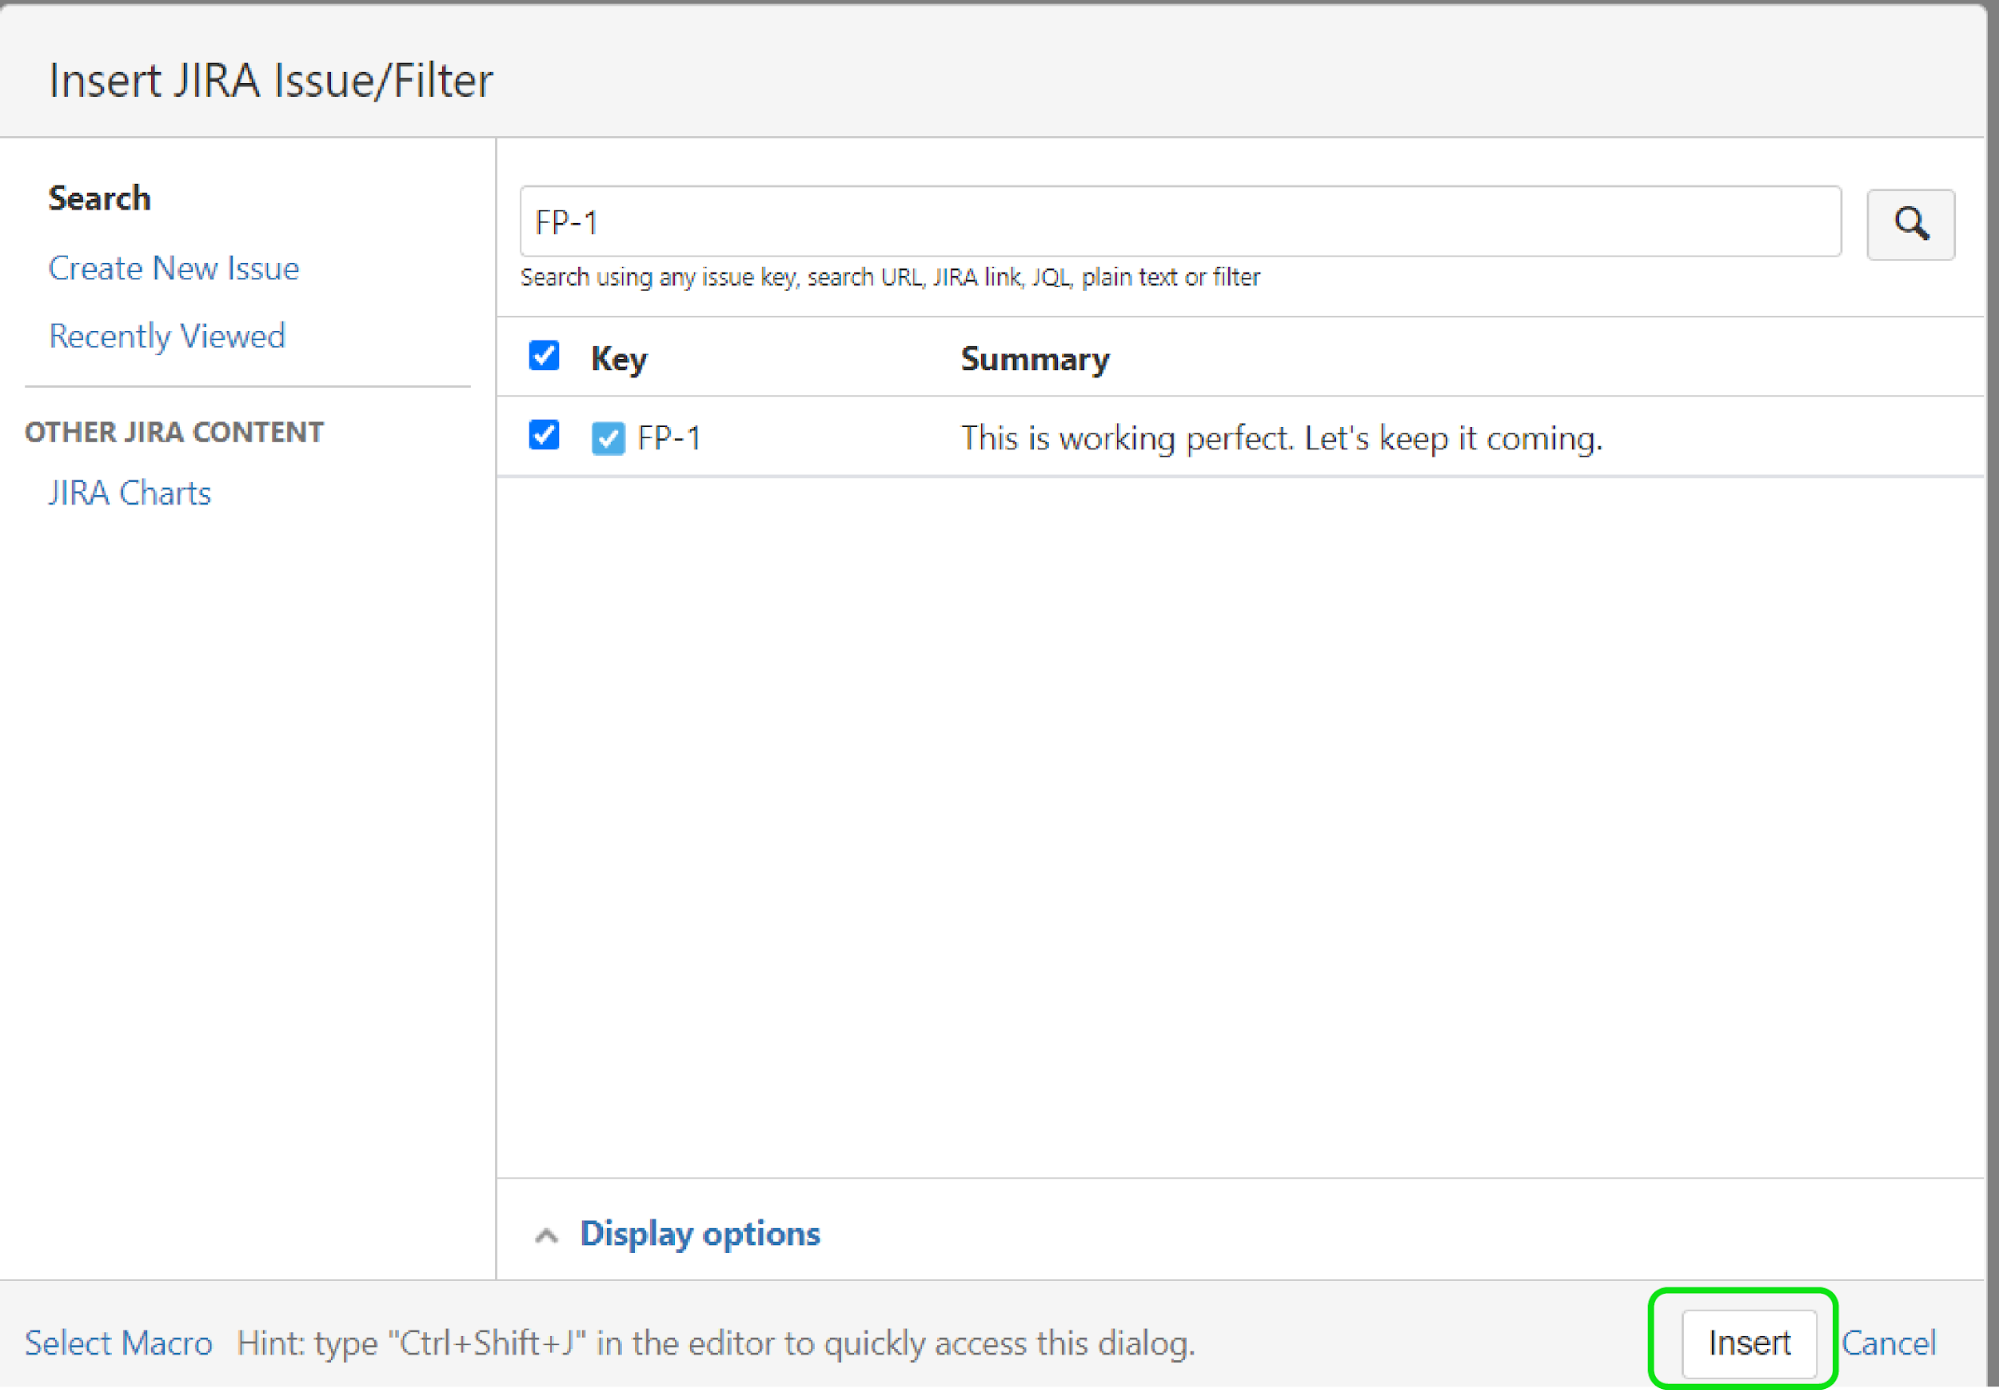
 3. Search for the Jira Issue you want to display. Once you have found it, click Insert.


3. Use a Confluence-Embedded Jira Issue Collector to Streamline Issue Creation
To access Jira feedback directly in Confluence, you can do so by embedding a form directly on your Confluence page. This form, known as the Jira Issue Collector, is linked to a trigger tab along the edge of your page that you click for access.
To embed your Jira Issue Collector in Confluence, you can follow the steps below:
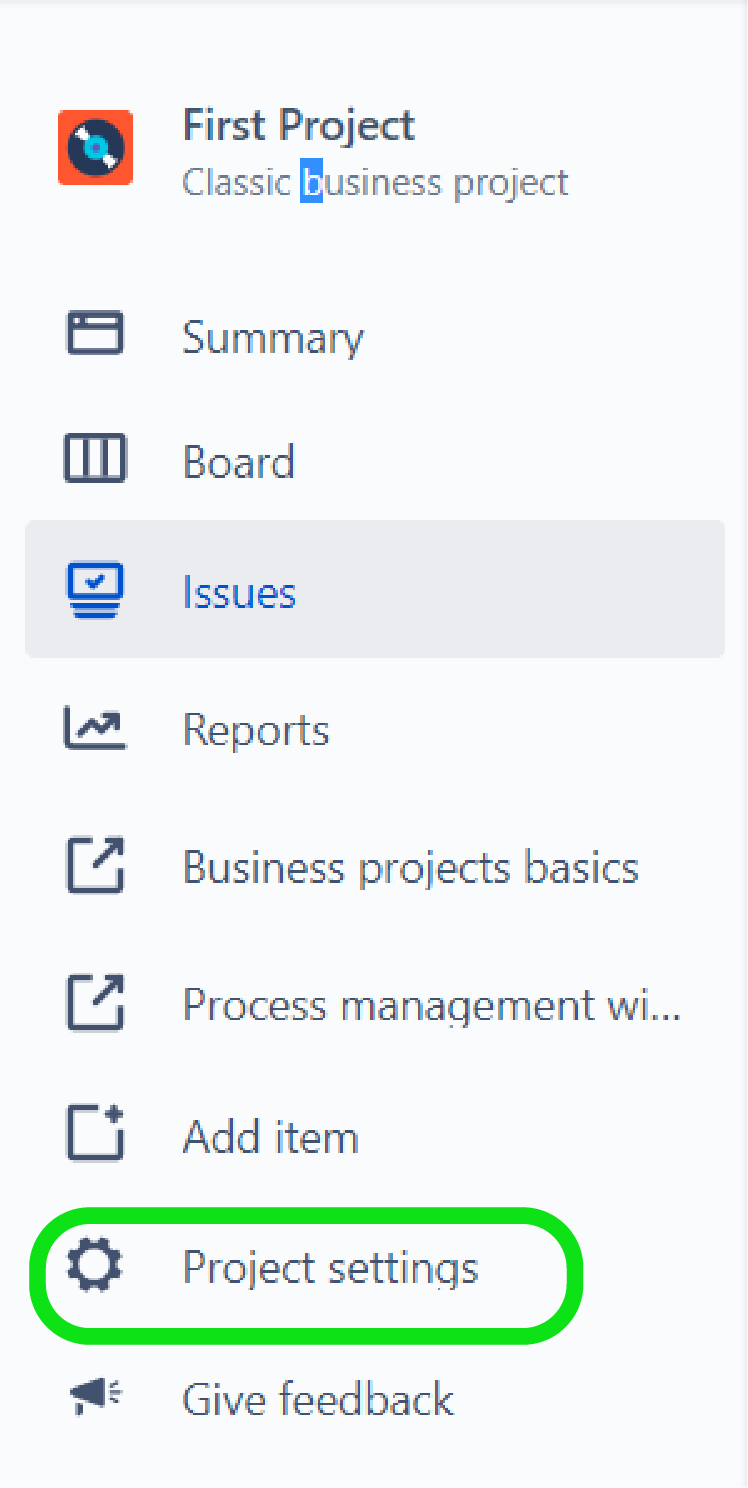
- In your Jira Project, click on Project Settings.

- From the left side panel, select Issue Collectors.

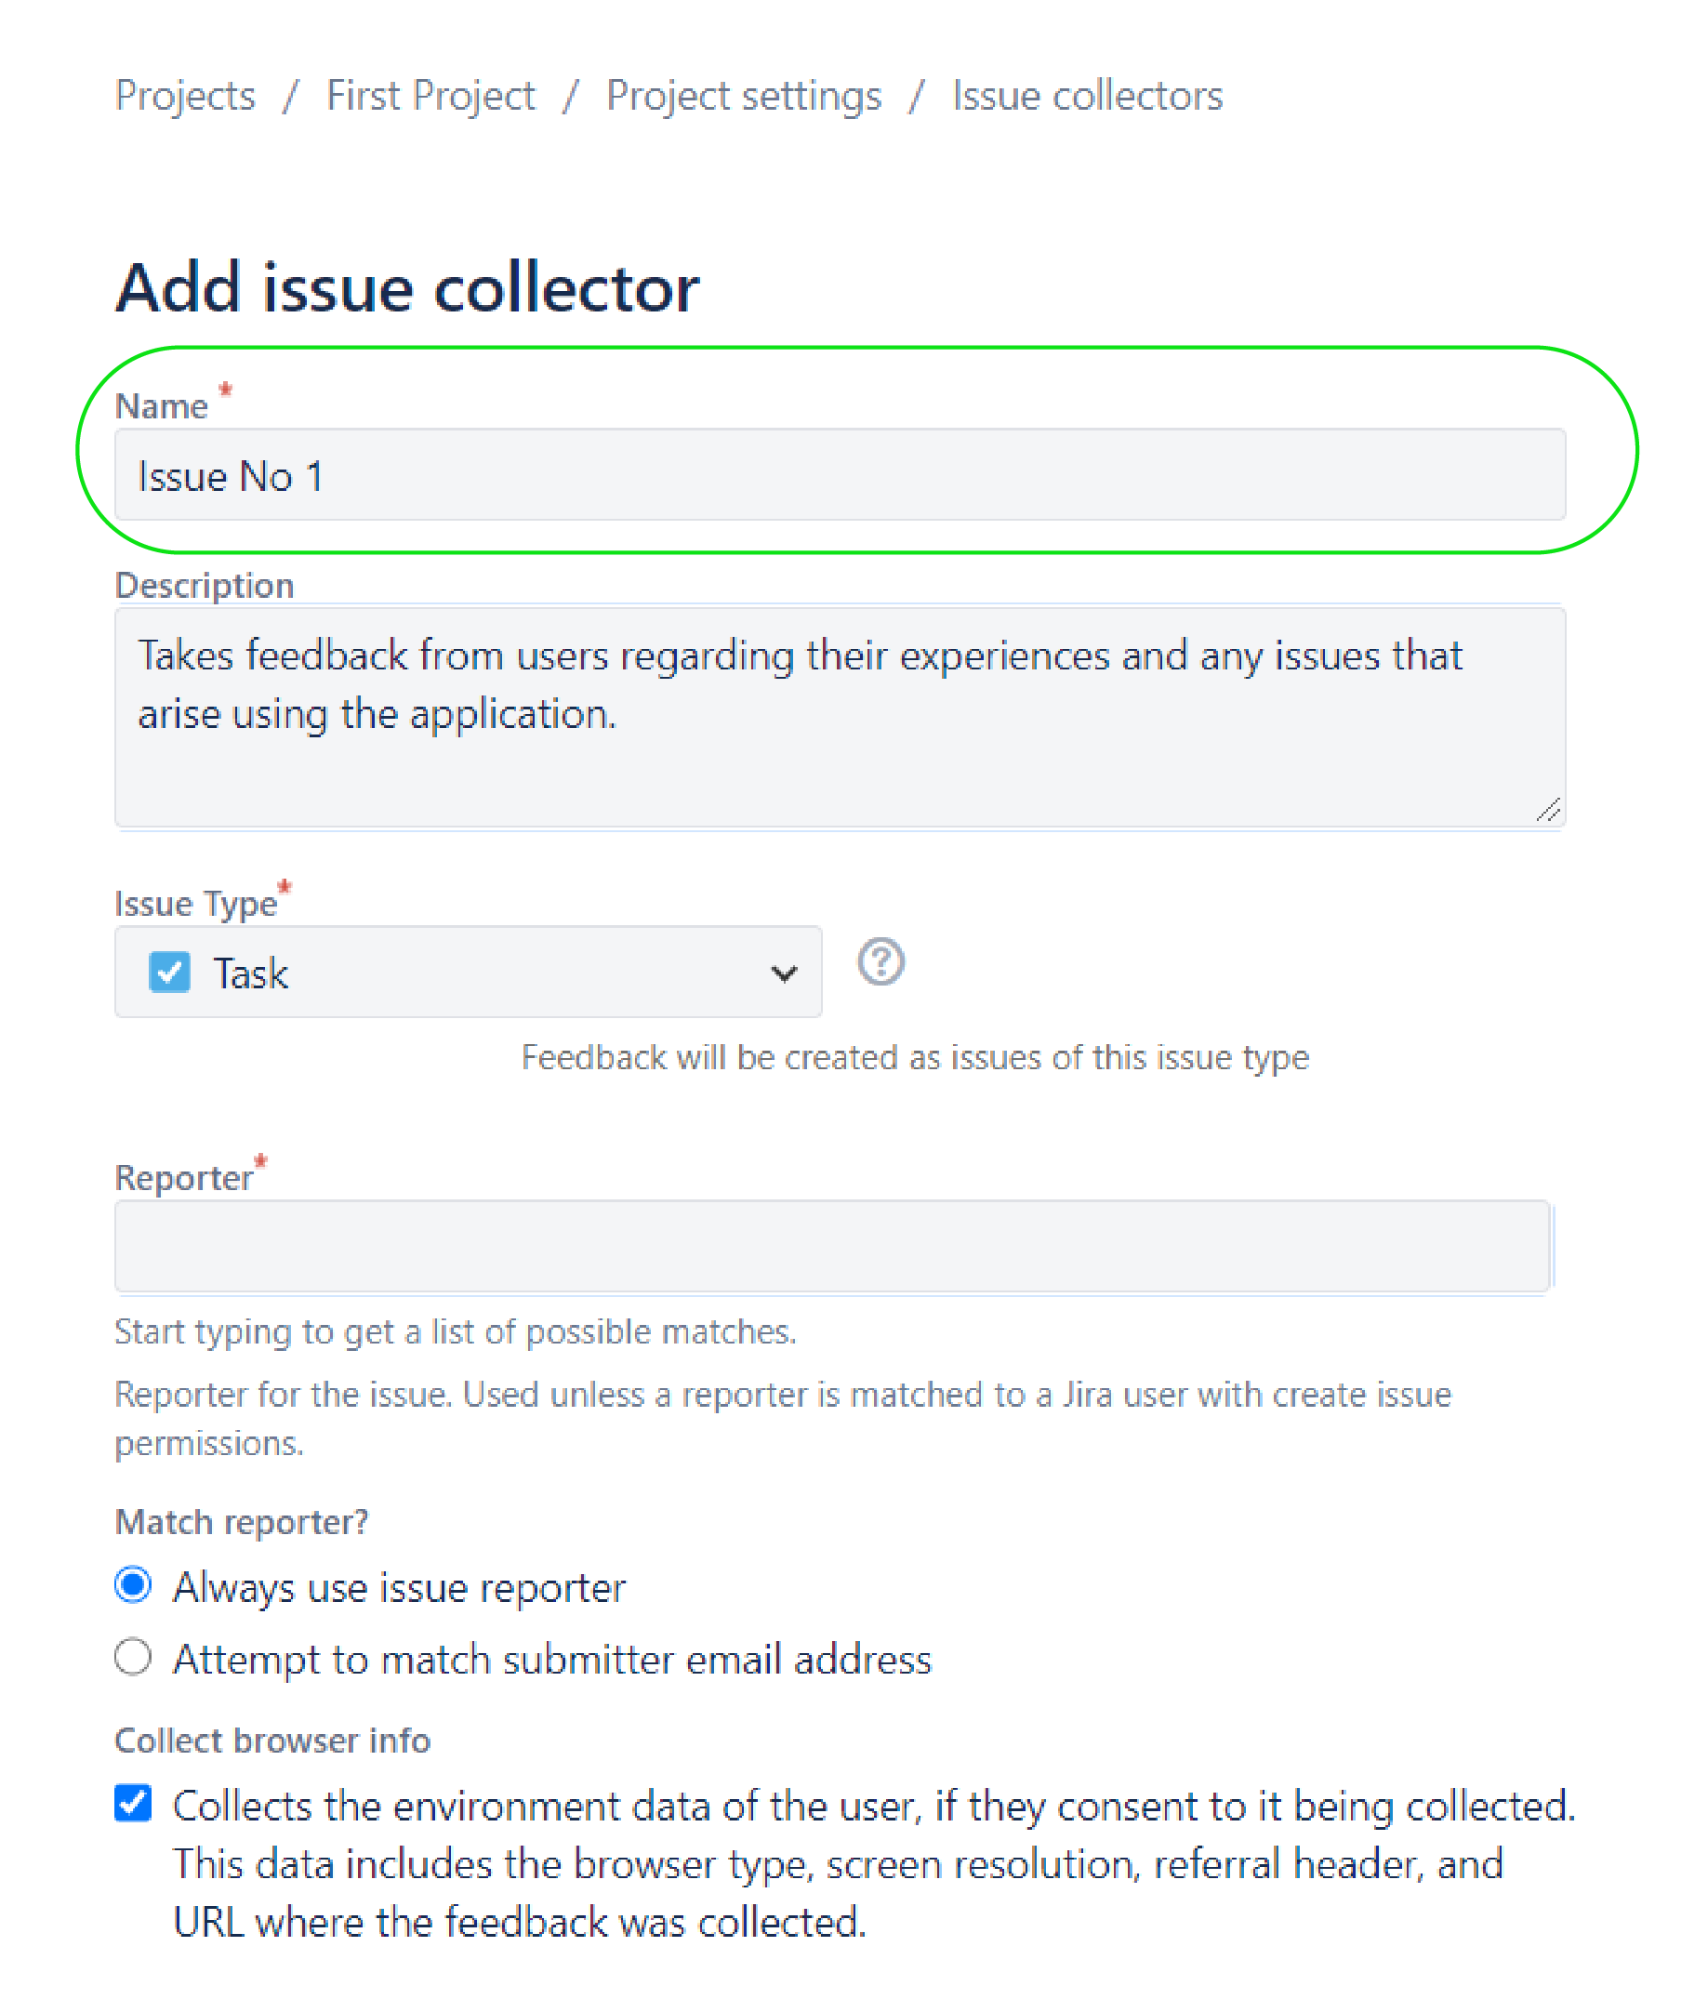
- On the next page, click on Add Issue Collector.

- Specify the details of the issue collector on the Add Issue Collector page as the user should see them.

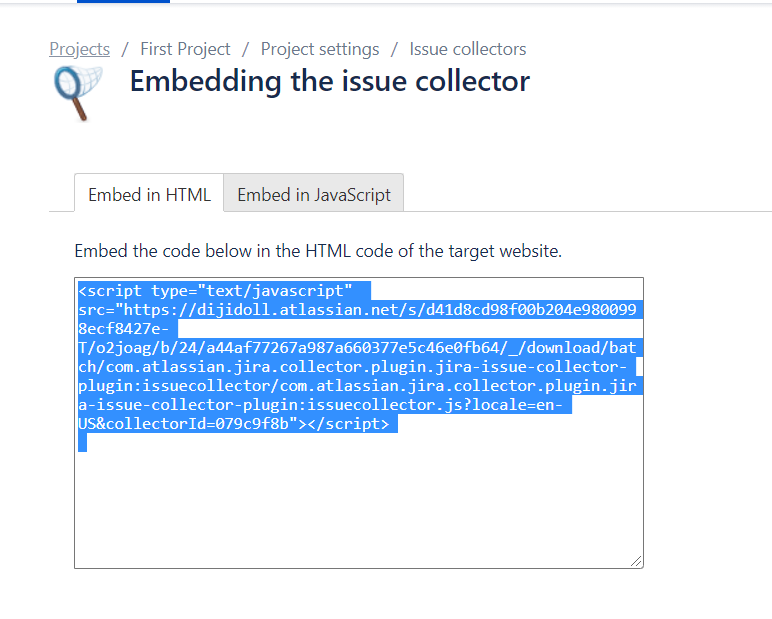
- You’ll be redirected to the Embedding Issue Collector page with details of your issue collector.

- On the Confluence page editor, click on the Insert icon. And then, click on View More.

- Choose External Content, then choose Jira.

- As the last step, enter the URL of your Issue Collector as displayed on the Jira Embedding Issue Collector page.


4. Utilize Dynamic Links to Track Jira Issues Directly on the Confluence Page
A significant part of improving workflows involves eliminating the need to switch between applications. With a Jira-Confluence integration, you could easily track Jira issues directly on the confluence page. This gives your team enhanced context and traceability to streamline efficiency in all product development processes. The process is also straightforward since you only need to paste the URL of your Jira issue onto the Confluence page. Confluence automatically creates a dynamic link on the page, and once published, this link will display details like Issue Title, ID, Category, and Status.
5. Connect the Jira Service Desk to the Confluence Knowledge Base
You can use the Confluence Knowledge base to provide your Jira users with self-help resources. This feature applies to the Jira Service Center and Data Center. Self-help acts as a handy option that makes it possible for the project staff to resolve issues without creating a request. Follow this guide to learn more about connecting Jira Service Desk with the Confluence Knowledge Base.
6. Use the Confluence Team Calendars to Manage Events
Confluence team calendars allow you to schedule personal and team events so your team members can communicate availability, and you can keep your project organized. These calendars come with custom views that make it simple to view project team assignments from high and low levels. To work with calendars, you’ll first need to Enable Team Calendars in Confluence. Once you have linked your JIRA application to a Confluence Page, you can add, update, and delete JIRA events from your Confluence page by following the tips on this guide.
7. Use Confluence’s Product Requirements Blueprint to Define Desired Properties for Jira Applications
Sharing your product’s desired properties is the best way to kick off software development in an Agile setup. The Confluence Product Requirement Template lets you create a shared understanding between your team members by hashing out complex requirements in a collaborative environment. This tutorial helps you understand how to prepare a Product Requirements Blueprint using templates available in Confluence.
8. Use Jira to Delegate User Management in Confluence Cloud
Since you can’t perform user management on the JIRA cloud, you will need to delegate this function to Confluence Cloud. Before you set this up, you should ensure that the JIRA users have valid permissions and belong to the correct JIRA groups. To set up Delegated User Management:
- In Administration mode, click Users then JIRA User Server
- Select Add Application.
- Enter the Name and Password that Confluence will use to access JIRA
- Enter the IP Address of your Confluence Server.
- Save this application.
You can now manage and delegate user permissions for your Jira instance directly from the Confluence cloud.
Important Note: This setting is only available for Jira versions 4.3 and 4.4. Additionally, only site admins will have access to user management solutions by default.
The only thing left is to start!
Integrating Confluence with Jira act as a great enabler to keep projects organized and help resolve issues faster by providing information on a single, accessible page. Essentially, this approach allows Jira users to resolve issues on their own by connecting them with the Confluence knowledge base. Moreover, with the Confluence Teams Calendar, project managers assign tasks and deadlines to team members based on their availability, further streamlining Agile operations. Getting started is also simple, so long as you have preconfigured all dependencies and other requirements.
Give it a try, and let us know in the comments below if you faced any roadblocks while doing so.


