If you’re already a Confluence user of any length of time, you know it’s an incredible platform for collaborative development and communication. However, like any powerful tool, it does take time to learn to use correctly and most efficiently. Additionally, creating content that is both organized and engaging is an additional challenge. It’s not just about “putting it all out there”, you want your users to be able to find the information they need quickly and truly feel enveloped in the work they’re doing.
How does one do this? How do we create content in our Confluence pages that draw our users in while still allowing them to quickly find what they need? Thought you’d never ask. Aura Tab and Aura Tab Group macros, as part of the Aura - Beautiful Formatting Macros Confluence App, are an incredible pair of macros from the developers at Seibert Media.
Plays Well Together
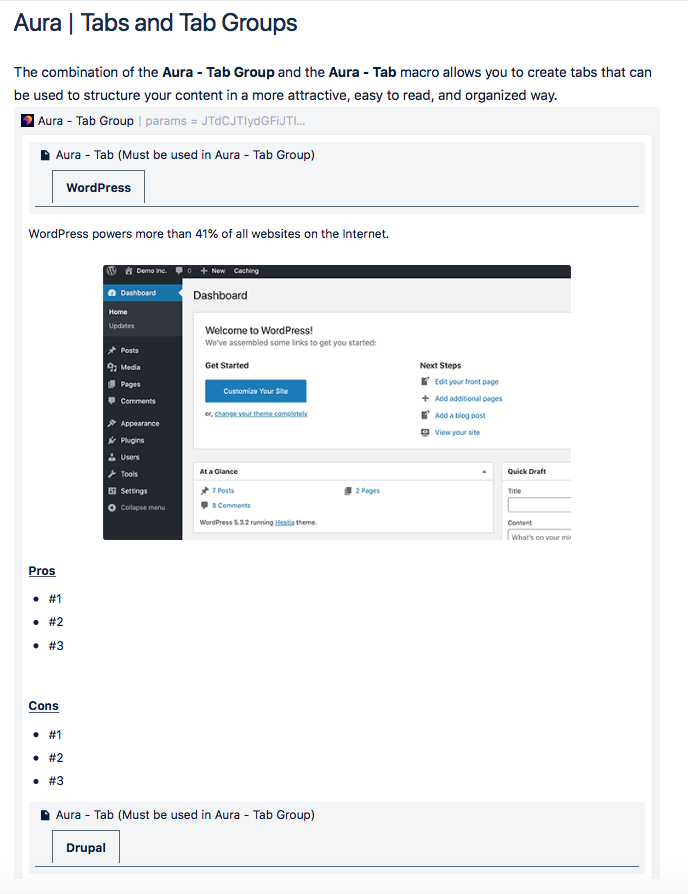
Aura Tab and Aura Tab Group macros allow you to create tabs that can be used to structure your content in a more attractive, easy to read, and organized way. Aura Tab Group macro is the outer shell and is used to control the design of all the Aura Tab macros inside that group. Therefore the Aura Tab macro has to be inserted inside the Aura Tab Group as often as needed.

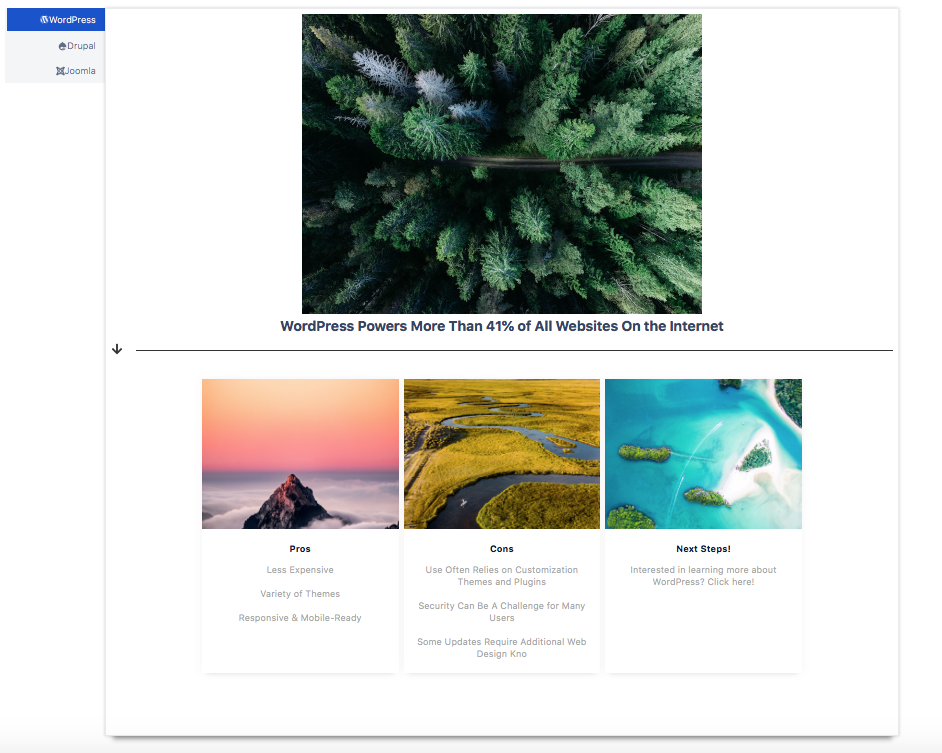
Tabs work like file folders. The outer folder, in our case, the Aura Tab Group, is the green hanging folder. For an example, let’s say we want to add a tab group to our page regarding Content Management Systems (CMS). Inside of that we’ll include file folders, Aura Tab, for the major ones; WordPress, Drupal, and Joomla.
Both Aura Tab Group and Aura Tab come with their own respective customization options. Aura Tab Group provides a live preview on the right that shows the result in realtime, whereas the Aura Tab is a simple form and does not need a live preview.
Let’s Dive In
To begin, create a new page in Confluence and from the menu bar choose the Insert option. From the pop-up search dialog, type in Aura Tab Group and then select that macro. Once in the macro, you’ll note on the left hand side two sets up options; Templates and Configuration. In brief, Templates define the overall layout of the tabs, Configuration gets very specific to look and functionality. The options under Templates lets you choose the look of the tab group - the size, shape, and overall style (horizontal or vertical) of the tab group.

For Configuration, the options are much more extensive and are separated into five sections; General, Active Tab, Inactive Tabs, Hover for Inactive Tabs, and Content. Under General, choose options such as the direction (horizontal or vertical tabs), and size (e.g. tab size for width, height, and spacing). For the Active Tab, Inactive Tab, and Hover options, you can adjust settings for the background color, border, and whether it should be an icon or text. And finally for Content, make changes from everything from background color, border, padding to shadow.
Now Onto the Tabs
You’ve set the stage for how you want your tabs to look and function via the Aura Tab Group settings. All tabs that you place within that group will now inherit those traits. Now we need to create the actual tabs themselves and their respective content.
To do so, on your Confluence page, click back into the Aura Tab Group you just created. Now, click the Insert option, type in Aura Tab and select that macro. In the configuration panel, you can now enter a Title and choose an Icon. When completed, click Save and you’ll be returned to your page where under that new tab, you can enter content just as you would with any Confluence page. You will do this for all tabs that you want included in that group. In our CMS example, we entered tabs for WordPress, Drupal, and Joomla, we added images for each and formatted content. How simple is that?!
When you’re ready, hit the Publish button and behold the beauty and functionality of your tabs. Each tab inherits the look and functionality of the group it’s placed within. Your content is now not only organized, but it looks incredible, it’s engaging and as a result, that much more effective. Yeah you!
Wrapping Up & Next Steps
You’ve now seen just how easy and powerful the tag team of Aura Tab Group and Aura Tab can be. However, in addition to these powerful tools, there are a variety of other Aura macros for you to explore and create with;
- Status: Add a customizable and predefined status label
- Divider: Separate content with a customizable horizontal line
- Cards: Beautiful cards you can link to the content of your choice
- Title: Add a beautiful headline to get the reader’s attention
- Panel: Highlight information in a customizable panel
- Button: Customizable, engaging buttons linking to your content
- Background Color: Use images and colors as a background for your content
To dive deeper into the features and functionality, you can check out our Aura Macro Walkthrough here. If you’re ready to make the leap and get going with this dynamic duo, and the full Aura suite of macros, head on over to Atlassian’s Marketplace.
Live demo and free test
Would you like to learn more? See examples or use cases or try out the new status feature directly? Then you can test it yourself here to your heart's content or book a live demo. Or do you want to get started right away? Our Aura team gives a 90-minute online training course, which is great for getting to know the functional basics and using the product effectively.
Further information


