The Scaled Agile Framework for Lean Enterprise SAFe® is the leading Framework for implementing and scaling agile methodologies throughout a company. However, to be able to anchor it pragmatically in an organization, in addition to consulting, training and coaching, a tool that promotes agile methods according to SAFe® is also needed. “Agile Hive- SAFe in Jira” is such a solution, which I have already successfully implemented for several customers. It is crucial for success that the corresponding Agile Release Train (=ART) and its members are introduced to the instance in a well-thought-out manner to reduce fear of contact and increase acceptance. A target-oriented approach is to already use Agile Hive in the early training when preparing the first PI Planning.
This short article describes the individual steps on how to create an Agile Hive instance that already includes the contents of the Geekbook PI Planning simulation from the SAFe® for Teams training. I assume the creation of issues, users and other basic functions of Jira are well known.
Have fun!
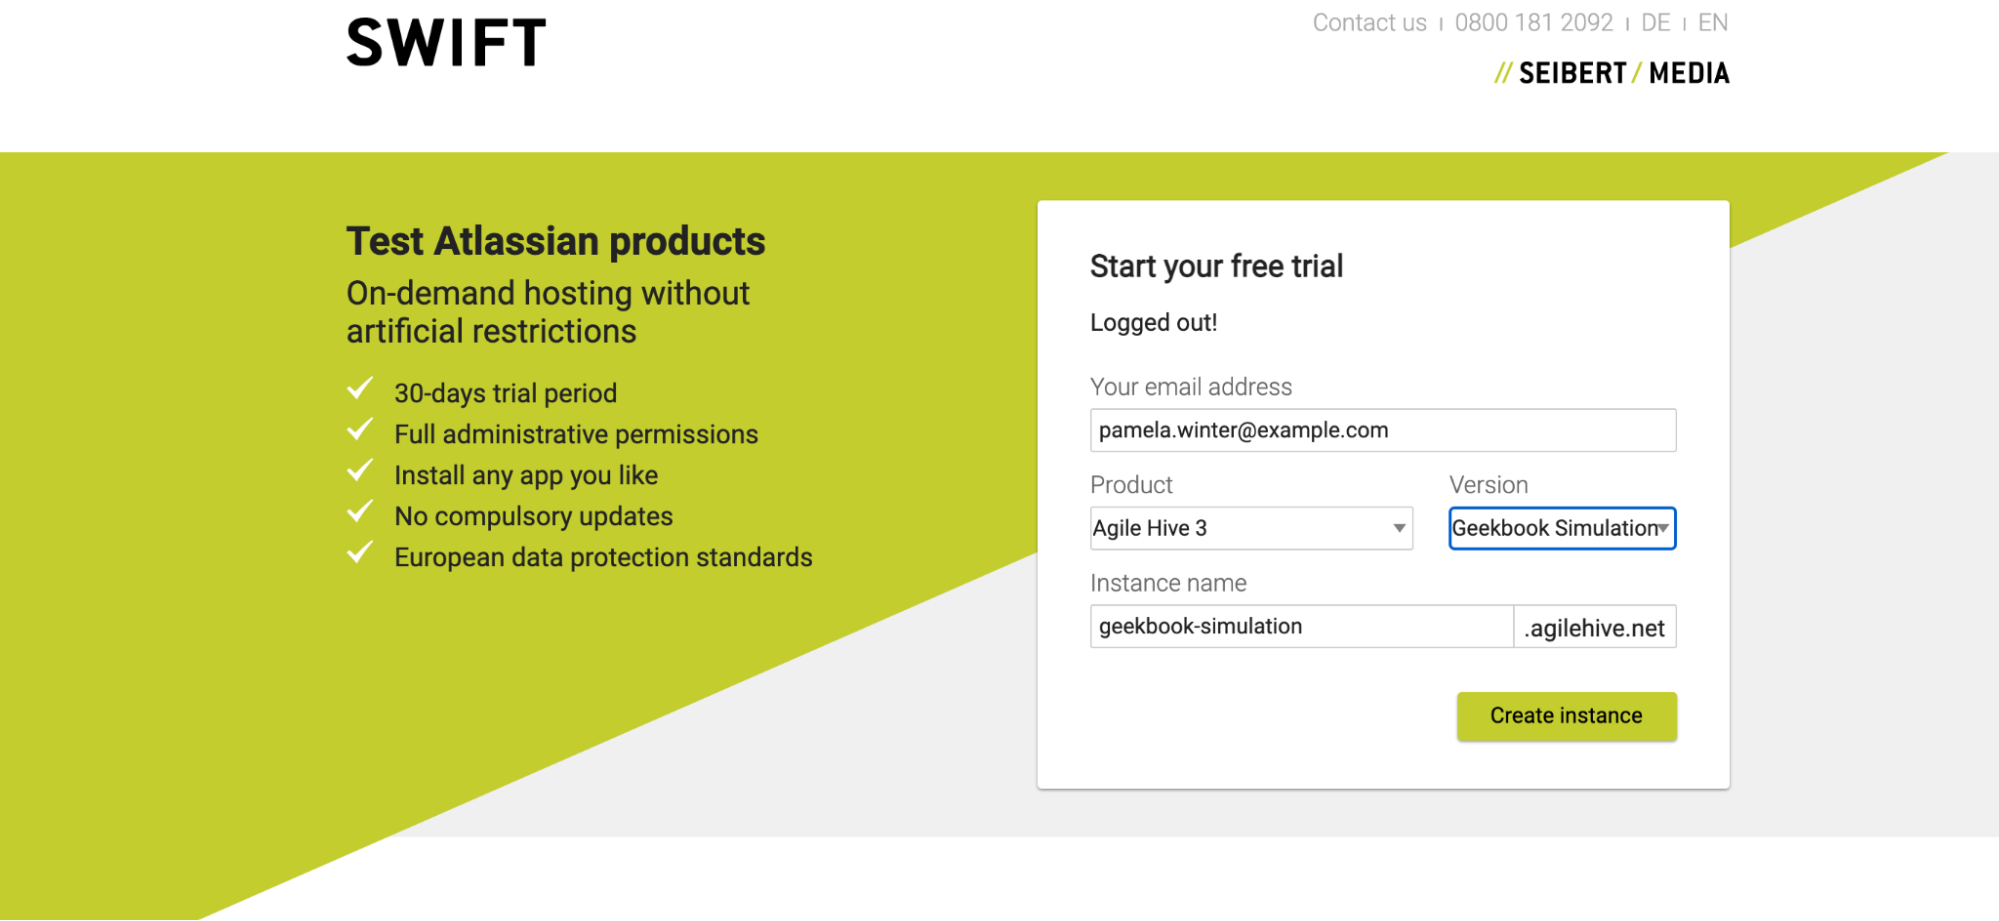
Step 1 - Creating your own private Agile Hive instance
Using the link https://swift.seibert-media.net/ you can create your own private Agile Hive instance for free, to which only you have access.
All you have to do is enter your email address, select the product “Agile Hive” and the version “Geekbook Simulation”. Last but not least, you have to give your instance a name and click on the “Create Instance“ button. As soon as you have agreed to the terms of use, you will receive your login credentials as the user “admin”. As soon as the instance has been created (waiting time approximately 10-30 minutes), you will be informed automatically per email.
Step 2 - Login & Navigation
Log in using the account “admin” and the password you set in the previous step:
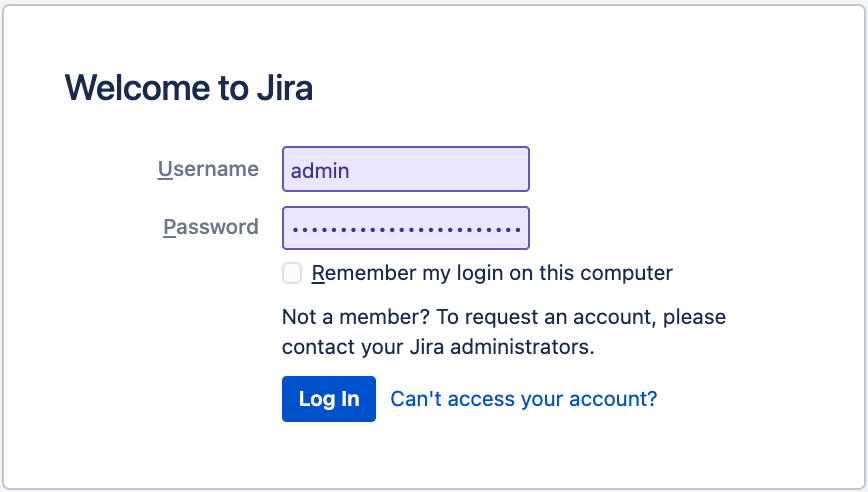
The password for all standard users is “geekbook”.
After successfully logging in, you will find yourself on the Jira System Dashboard, in which the documentation of Agile Hive is embedded, giving you the opportunity to dive deeper. The documentation is also available here: https://seibert.biz/agilehivedocumentation.
To access the PI Planning Simulation, click on Agile Hive in the top navigation bar and then on Geek Books.

Step 3 - Create Program Increment (PI)
You are now in the Program Reports view, which prompts you to create a new Program Increment:
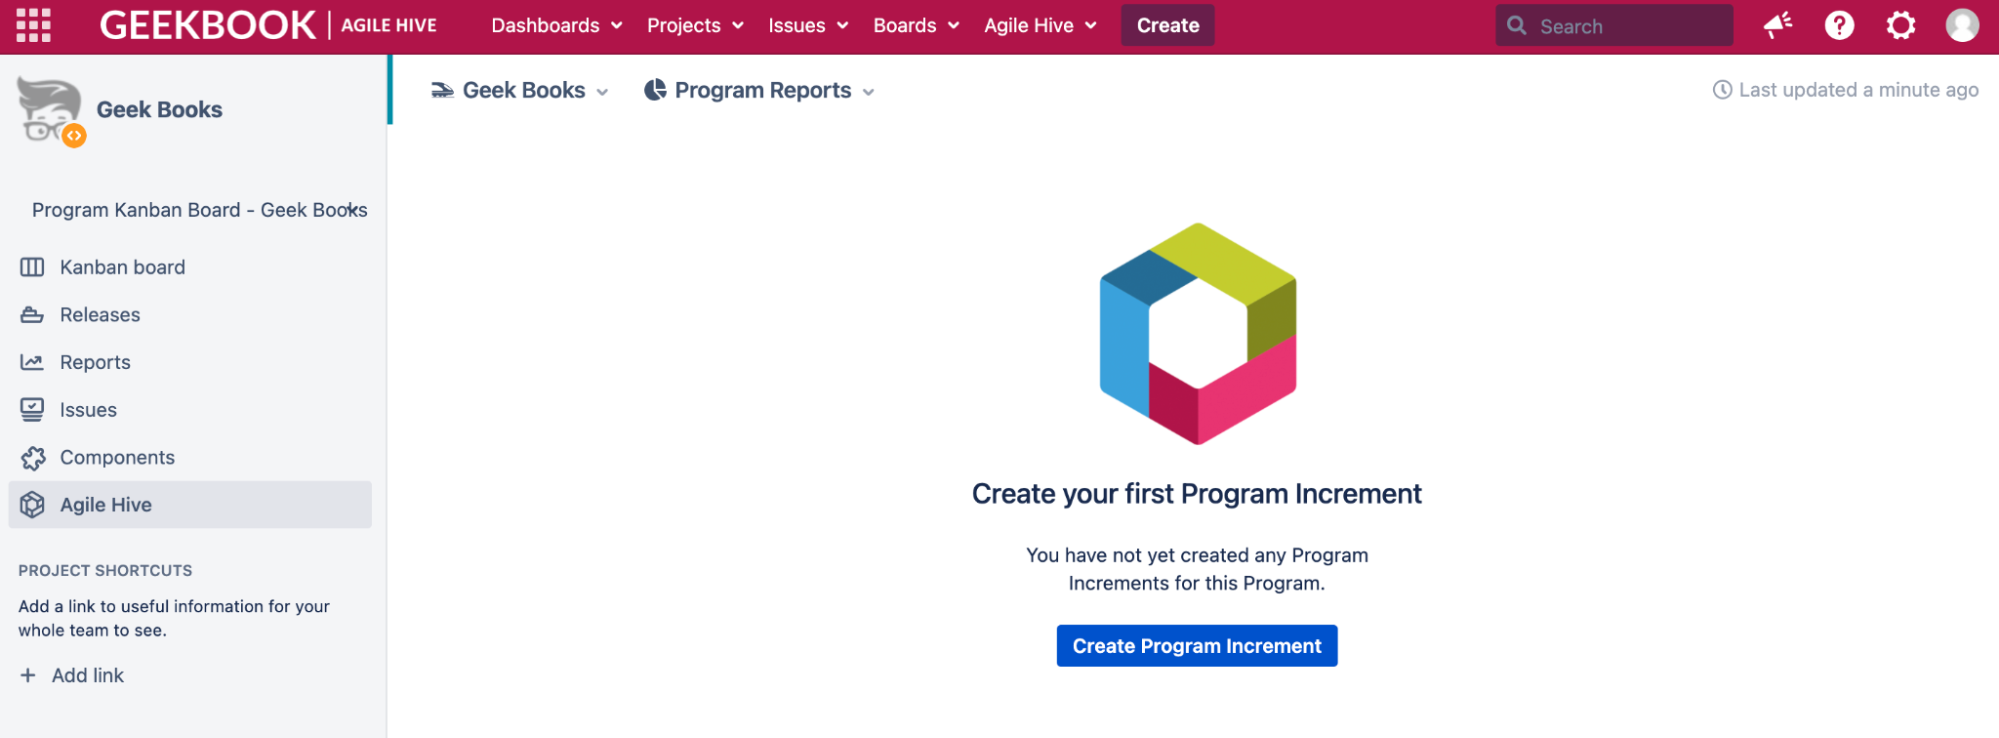
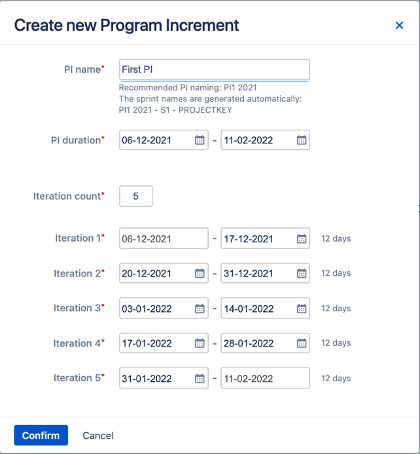
Click on the blue “Create Program Increment” button and enter the following information:
- PI name
- Start and end (PI duration)
- Iteration count
- Start and end of every iteration (each iteration can be different)
As an example:
Click on Confirm and wait for Agile Hive to create the PI, the Iterations and the Sprints in all Teams. Once it's done, the following view appears:
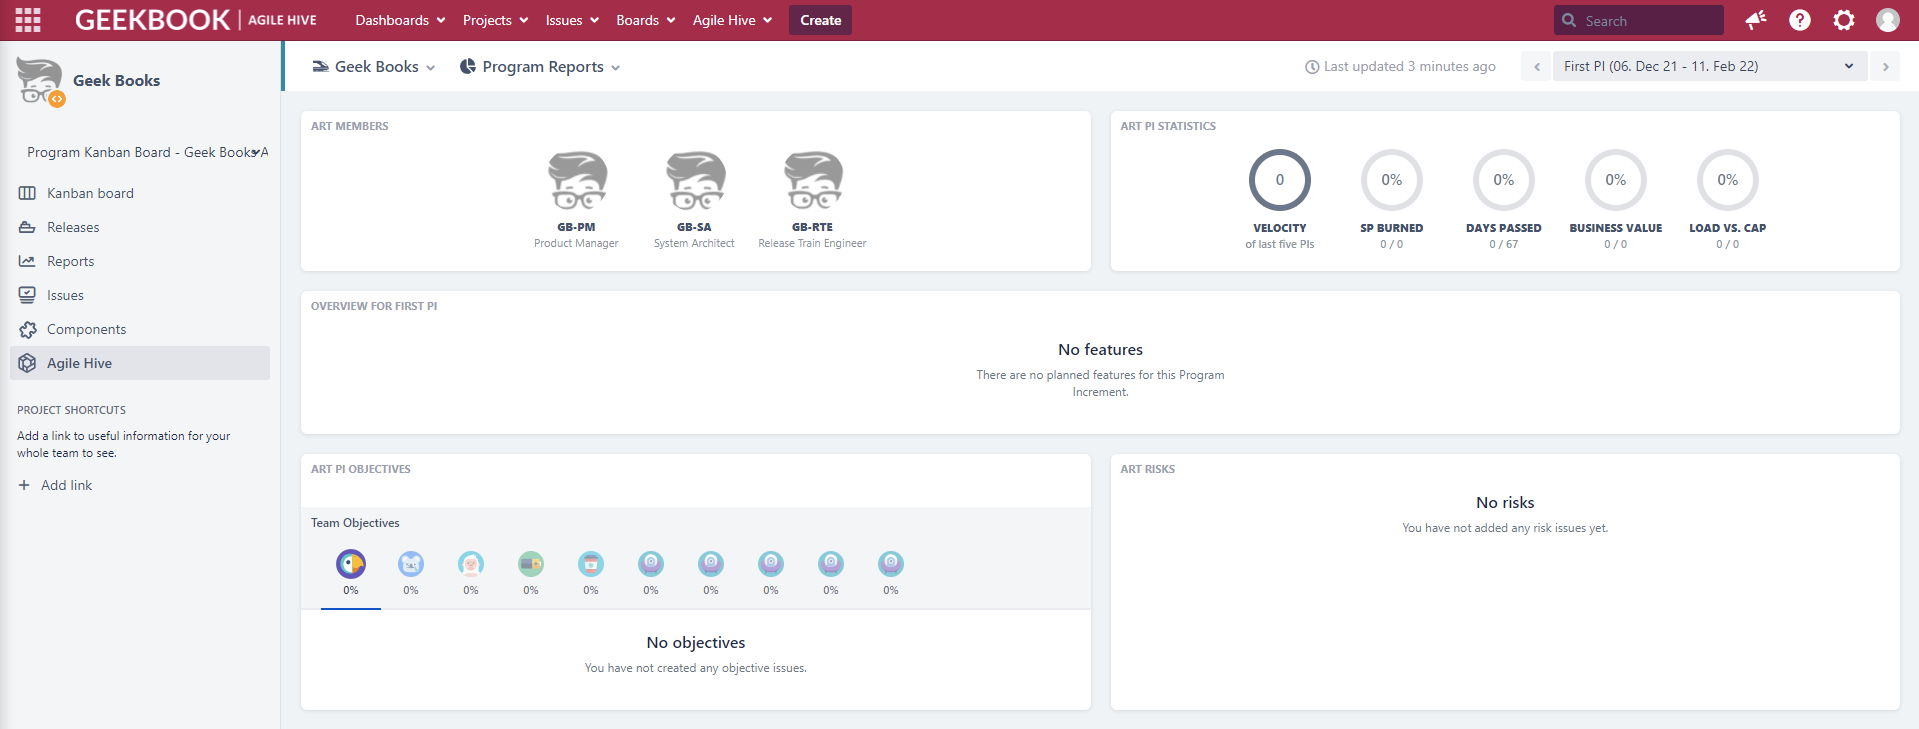
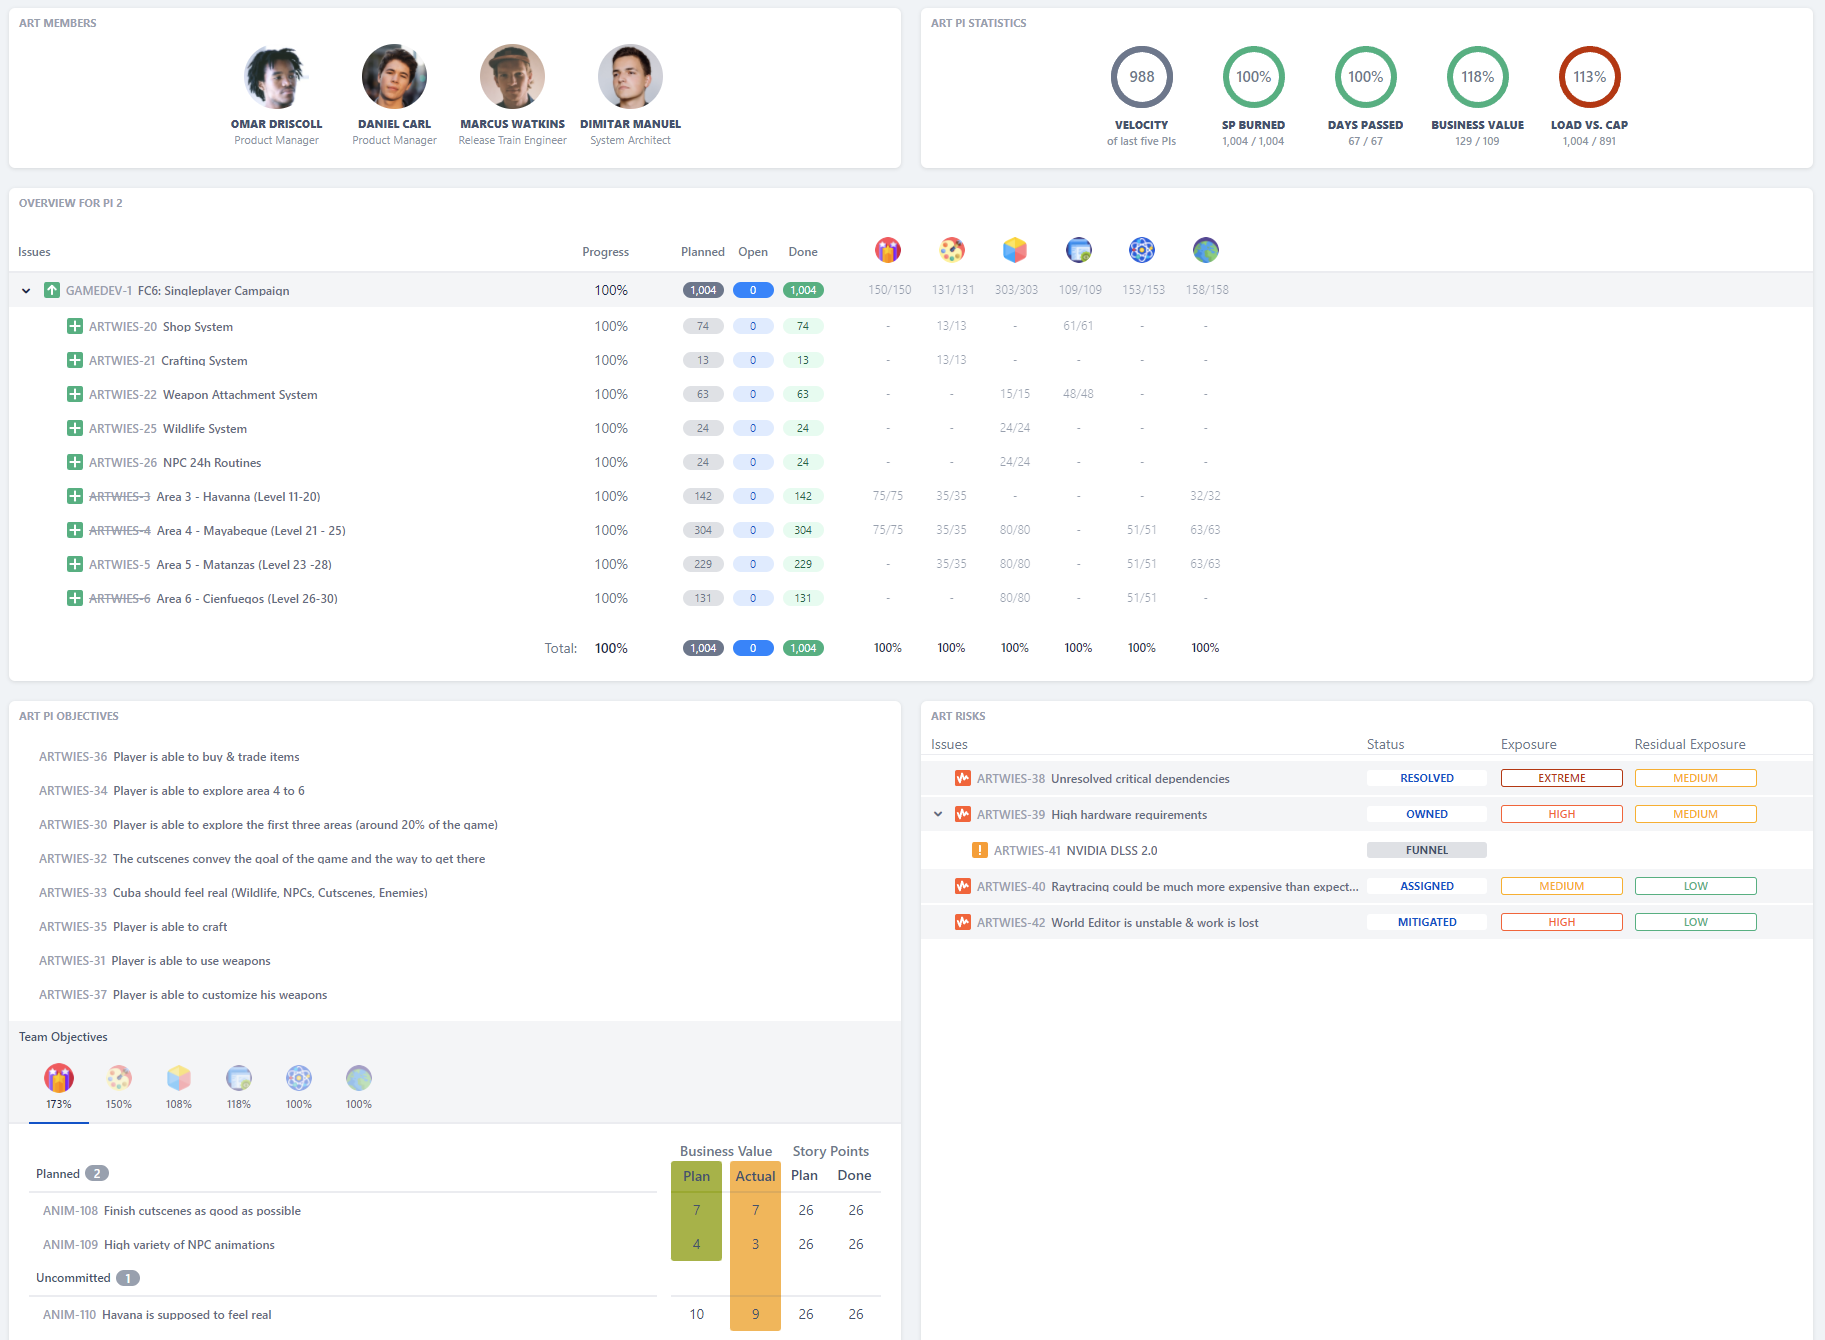
Since features have not been planned into the new PI and objectives or risks have not been created, the view is still quite empty. But this will change automatically as soon as you start planning. The following is an example with content from an already completed PI:
Step 4 - Understanding the Jira structure
In this step, I would like to briefly explain the structure of the Jira projects I have already created - in this case one ART and ten teams.
The ART is called Geek Books and the teams are called Team AJ. The ART and the teams all have their own Jira projects (11 of them) and can be differentiated.
As you can already see in the Program Report in the ART MEMBERS tile in the upper left corner, I have already created three users with specific train roles for the ART: GB-PM, GB-SA and GB-RTE. For teams A to B, nine developers, one product owner and one scrum master are stored.
Admins can create more users and add them to the teams.
Step 5 - Navigation
In the following screenshot, I´ll show you how you can quickly and easily switch to the views of the different teams. Hover over the “Geek Books” dropdown and then select the team you want.
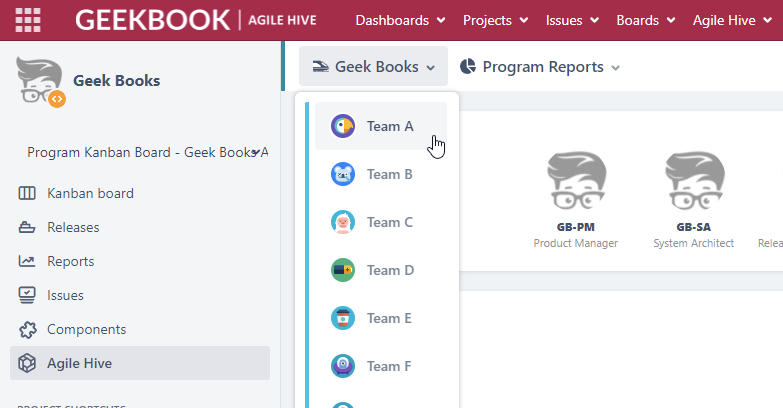
You can also switch back to the ART view using the same dropdown. The ART is located at the bottom of the drop-down list.
Using the second dropdown, you can switch to specific SAFe views. Select the Team Backlog of Team A here.
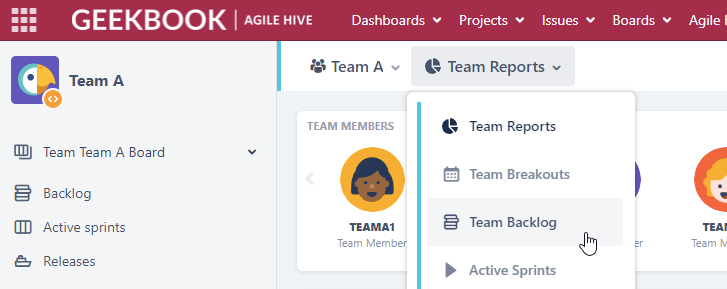
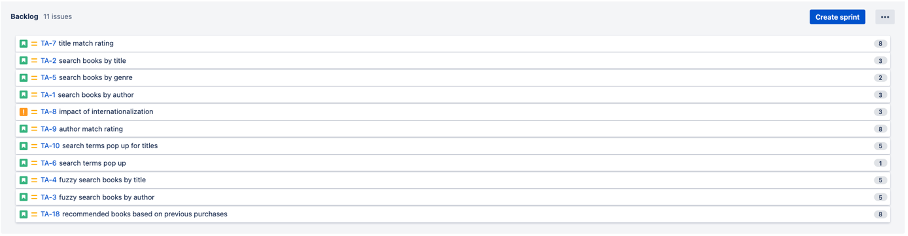
Step 6 - Team Backlog
In the Team Backlog view, you need to scroll all the way down to reach the backlog. The assignment of features to teams is as follows:
- Team A → Feature 1
- Team B → Feature 2
- etc.
Accordingly, the existing Starter Stories for the features are assigned to the corresponding Team Backlogs. If a different assignment is required, this must be maintained by the administrator in advance.
Step 7 - Creating more users (optional)
If adjustments need to be made to the users, the “admin” user can do this via User Management (Jira Administration > User Management) Here you can find:
- the train roles product Management (GB-PM), System Architect/Engineering (GB-SA) and Release Train Engineer (GB-RTE),

- as well as several team members (example: Team A):
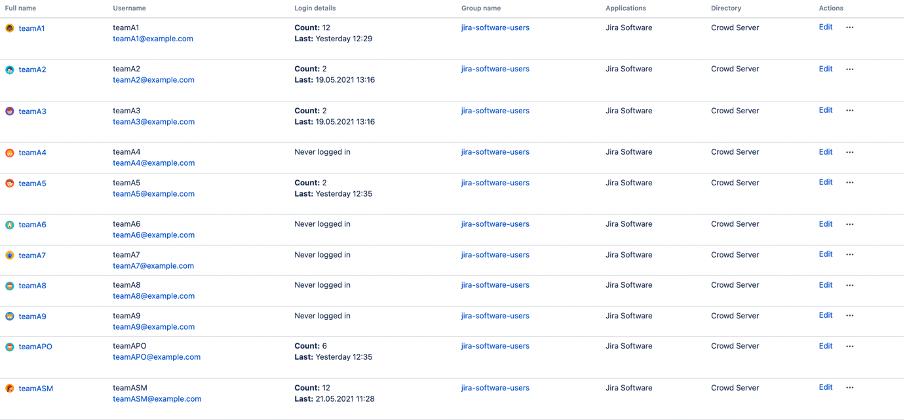
Here you can add, delete and change user accounts as required for the execution of the Geekbook simulation.
Ready to go?
That´s it! As you can see, it is not rocket science to set up an Agile Hive instance that includes the contents of the Geekbook PI Planning Simulation. Nevertheless, in a complex process it is important that especially ARTs are taken along and accompanied from the beginning. Then Agile Hive quickly develops into an accepted and flexibly deployable solution with which agile scaling not only comes within reach, but also actually becomes feasible.
Further Reading
- Agile Hive: PI Planning in the time of Covid-19
- Remote PI planning with Agile Hive
- Online PI Planning for remote teams


